
Planning a backyard transformation can feel exciting, but tackle projects in the wrong order and you could end up paying twice for the same work. Dig a planting bed before rerouting a water line, or install a fence before grading the yard, and you risk tearing out brand-new work just to fix something underneath it. The key to a smooth outdoor renovation is sequencing: handling the invisible infrastructure first, then layering in structures, surfaces, and finishing touches.
This guide walks through the logical order for outdoor upgrades so your time and money go toward lasting results, not rework.
Start With Underground Utilities and Plumbing Checks
Before any shovel hits the ground for a major landscaping or hardscaping project, it is worth confirming the condition and location of everything buried beneath your yard. Outdoor kitchens, irrigation systems, and new patios often require water or gas lines, and discovering a cracked pipe after a patio is poured means cutting into fresh concrete. Calling a plumber early in the planning process lets you map existing lines, check for leaks, and plan new hookups before anything permanent goes on top.
This step also protects you from costly surprises later. A plumber can advise on whether your current water pressure can support an outdoor shower, irrigation zone, or hose bib addition, and can flag any aging pipes that should be replaced while the ground is already open. Addressing plumbing first means every later project builds on a solid, tested foundation.
Evaluate Heating and Cooling Equipment Placement

Many homeowners forget that outdoor renovations often intersect with home climate systems, especially when a deck, patio, or sunroom addition sits near an outdoor compressor unit. Before pouring footings or laying pavers near your home’s exterior wall, check the placement and clearance requirements for any heating or cooling equipment. Local heating contractors can tell you how much clearance a furnace vent or heat pump needs, which prevents you from building a beautiful new structure only to discover it blocks required airflow or service access.
This is also a smart time to have equipment inspected, since construction dust and debris can clog outdoor units if work happens nearby without protection. Scheduling a checkup before the project starts means your system is documented and running well, so you can tell whether any post-construction issues are related to the renovation or simply due for maintenance. Getting this sequencing right avoids the frustration of rerouting ductwork or relocating a unit after hardscaping is already finished.
Address Drainage and Grading Before Hardscaping
Water always finds the lowest point, and if that point is your new patio or walkway, you will be dealing with pooling, erosion, or even foundation issues down the road. Grading the yard so water flows away from the house, and installing drains or swales where needed, should happen before any pavers, retaining walls, or fencing go in. Skipping this step is one of the most common reasons homeowners end up tearing out hardscaping within a few years.
Take time to walk your property after a heavy rain and note where water collects or rushes toward structures. Correcting slope issues now, while the yard is still a blank slate, is far cheaper than excavating around a finished patio later. This groundwork also sets up every project that follows for better long-term performance.
Install Fencing and Define Property Boundaries

Once drainage and underground work are settled, it makes sense to establish your property lines and privacy boundaries before adding garden beds, patios, or outdoor living spaces that might need to work around a fence line. Fencing early also protects pets and kids while other construction is happening in the yard. Many homeowners choose a durable, low-maintenance option, and an aluminum fence company can install a style that holds up to weather without the upkeep of wood or the rust concerns of older steel options.
Installing fencing before planting or hardscaping also means contractors working on later phases will not accidentally damage new landscaping while bringing in materials or equipment. It gives you a clear visual boundary to design around, which makes planning patios, sheds, or play areas much simpler. Think of fencing as the frame around which the rest of your outdoor picture gets filled in.
Build Structural Additions Like Patios and Enclosed Living Spaces
With utilities mapped, drainage corrected, and boundaries set, you are ready to tackle larger structural projects. Sunrooms are a popular addition because they extend living space without the full cost of a traditional home addition, but they require a level foundation, proper flashing, and careful planning around existing rooflines. Building this kind of structure before softer elements like landscaping ensures heavy equipment and construction traffic will not crush new plants or damage fresh sod.
Patios, decks, and pergolas fall into this same phase, since they are permanent, heavy, and disruptive to install. Getting these larger structures finished before softscaping also gives you a clearer picture of how much usable yard space remains for gardens, lawn areas, or play spaces. Tackling the big-ticket structural items in this order minimizes the chance you will need to disturb them again for unrelated work.
Plan Debris Removal and Site Cleanup
Major outdoor projects generate a surprising amount of waste, from broken concrete and old fencing to packaging materials and scrap wood. If you’re demolishing a patio, tearing out a deck, or clearing landscaping, that debris can accumulate faster than expected, cluttering the work site and slowing down every phase that follows. Rather than letting debris pile up or renting multiple dumpsters throughout a long project, look into construction recycling options that can process materials like concrete, metal, and wood instead of sending everything to a landfill. Many municipalities and private haulers now offer sorted bins specifically for concrete and masonry, which can be crushed and reused as gravel or fill for future projects. Scrap metal from old railings, fencing, or appliances often has resale value, and some recycling centers will even pick it up for free.
This is both an environmentally responsible choice and often a more affordable one, since many recycling facilities charge less than standard landfill disposal fees. Landfill tipping fees can run $50 to $100 per ton depending on your region, while construction recycling centers frequently charge 20 to 40 percent less for sorted materials. Before work begins, map out where debris will be staged, how often it needs to be hauled away, and which materials require separate bins. Planning this upfront prevents mixed, contaminated loads that can’t be recycled and keeps your yard from turning into an obstacle course mid-project.
Planning for debris removal before you start demolition or installation keeps your site safer and more organized throughout the project. It also prevents the common mistake of finishing a beautiful new patio or fence only to realize there is nowhere left to stage the leftover materials for pickup. Building a cleanup plan into your project timeline from the beginning saves headaches during the busiest phases of construction.
Start by mapping out a dedicated staging area before any work begins, ideally near the driveway or street access for easy pickup. Reserve enough space for separate piles or bins for different materials, since concrete, soil, lumber, and metal often need to be disposed of or recycled through different channels. If your project involves a dumpster rental, order it a few days before demolition starts rather than scrambling once debris is already accumulating.
Think through timing as well as space. Projects that generate heavy debris, like tearing out an old patio or removing a fence line, should schedule hauling or dumpster swaps at natural breakpoints rather than waiting until everything is finished. A mid-project pickup, for example, after demolition but before new materials arrive, keeps the site from becoming cluttered and reduces the risk of damaging fresh work with heavy equipment maneuvering around leftover debris.
Finally, confirm disposal logistics ahead of time, including whether your municipality has restrictions on curbside bulk pickup, weight limits for dumpsters, or special handling requirements for items like treated lumber or old concrete. Checking these details early prevents last-minute scrambling and keeps your overall project on schedule.
Prepare Soil and Lawn Areas for Planting
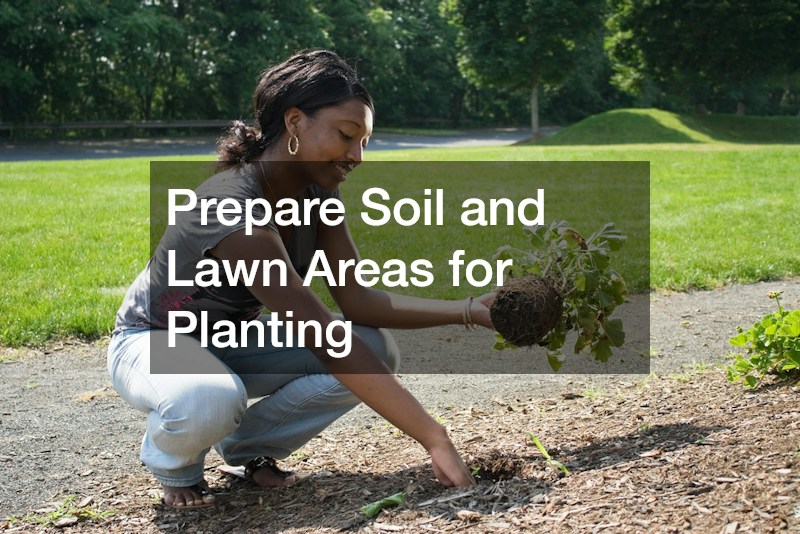
Once structures, fencing, and drainage are in place, it is time to turn attention to the soil itself. Hardscaping and grading work often compacts the ground or buries topsoil under fill dirt, so the lawn underneath needs real attention before anything green goes in. Lawn care services can test your soil’s pH and nutrient levels, which tells you exactly what amendments are needed before you lay sod or spread seed. Most grass species thrive in a pH range of 6.0 to 7.0, and a professional soil test will flag whether you need lime to raise it or sulfur to bring it down. The results also reveal deficiencies in nitrogen, phosphorus, or potassium, so you are not guessing at fertilizer ratios or wasting money on products your lawn doesn’t need.
Compacted soil from construction traffic may also require core aeration before seeding so roots can actually take hold. Skipping this step often leads to patchy, weak growth that requires expensive reseeding within a year or two. Timing matters too: cool-season grasses generally establish best in early fall, while warm-season varieties prefer late spring planting. Getting the soil prep and timing right the first time saves you from tearing out and redoing an entire lawn just a season or two down the road.
Once hardscaping, utility trenching, and major grading work are finished, this is also the right time to bring in topsoil or compost to correct any grading issues left from construction. Heavy equipment compacts soil far more than most homeowners expect, sometimes leaving it so dense that water pools on the surface instead of soaking in. A simple screwdriver test can tell you a lot: if you can’t push one six inches into the ground without effort, the soil likely needs to be aerated or amended before anything else happens. Spreading 2 to 4 inches of compost and tilling it into the top 6 to 8 inches of soil is usually enough to restore structure in moderately compacted areas. For spots where equipment sat for extended periods, such as near a driveway pour or a patio installation, you may need to till deeper or even bring in a core aerator before amending.
Checking the grade at the same time ensures water flows away from the foundation at a slope of at least 2% rather than collecting in low spots that will later drown grass seed or new plantings. Taking care of soil prep now, rather than after planting, prevents the need to dig everything back up to fix an underlying problem. It’s far easier to correct drainage, pH, or compaction issues while the ground is bare than to excavate around established roots later. A little patience here pays off in a lawn or garden that establishes quickly, resists disease, and stays healthy for years with less ongoing maintenance.
Finish Garden Beds With Mulch and Ground Cover
With soil prepared and plants in the ground, finishing touches like mulch help retain moisture, suppress weeds, and give garden beds a polished look. Bark dust is a popular choice for pathways and planting beds because it breaks down slowly, holds its color, and is easy to spread around existing plants without disturbing roots. Applying it after planting, rather than before, ensures you are not digging through a fresh layer every time you add a new shrub or flower.
Ground cover and mulch also play a practical role in protecting young plants from temperature swings and erosion during their first season. Waiting until this stage to add decorative groundcover means you will not need to replace material that gets disturbed by ongoing digging or planting work. This step essentially seals in all the soil and planting work completed earlier in the project.
Set Up Ongoing Lawn and Garden Maintenance
Once everything is installed and planted, shifting into a maintenance mindset protects your investment for years to come. Regular lawn fertilizing services keep grass thick and resistant to weeds, which matters most in the first couple of growing seasons when a new lawn is most vulnerable. Setting a seasonal schedule now, rather than waiting for problems to appear, keeps your yard looking consistent without constant troubleshooting.
Maintenance planning should also include a realistic look at your own time and energy for upkeep, since some homeowners prefer to handle mowing and trimming themselves while outsourcing feeding and pest control. Writing out a simple calendar for fertilizing, mowing, and seasonal cleanup helps you stay ahead of problems rather than reacting to them. This final step turns a newly finished yard into a landscape that continues to improve with age.
Keep Indoor Comfort Projects on a Parallel Timeline
While much of this guide focuses on the yard, many homeowners use an outdoor renovation as an opportunity to tackle related indoor projects at the same time, since shared contractors or disrupted schedules are already part of the picture. A bath remodel that includes a new window or exterior vent, for example, is easier to coordinate while outdoor walls are already exposed for other work. Similarly, checking in on air conditioning services before summer construction begins ensures your home stays comfortable while crews are working outside and doors are propped open.
Thinking about indoor and outdoor projects together, rather than in isolation, can reveal opportunities to save time and money by sharing permits, scheduling, or material deliveries. It also helps you avoid the frustration of finishing your outdoor space only to realize an indoor project will require digging up a section of the new landscaping. A little big-picture planning across both spaces keeps the entire renovation moving efficiently.
Conclusion
Sequencing outdoor upgrades correctly is less about rushing to the fun, visible projects and more about respecting what lies beneath and around them. Start with utilities, drainage, and structural work, then move toward soil, planting, and finishing touches, and you will avoid the costly cycle of redoing completed work. Take time to map out your specific project list against this order before breaking ground, and do not hesitate to consult professionals for the technical steps early on. A little patience in the planning phase is what separates a yard that looks good for one season from one that performs well for years to come.